


Salesforce SPF & DKIM Setup: Step by Step
Salesforce, the leading CRM application in the United States, offers advanced marketing technology and analytics tools. This guide is designed to help you set up Salesforce Email SPF and DKIM Records in your DNS, increasing security by preventing unauthorized domain use.
SPF records play an important role in checking the legitimacy of emails by allowing clients to confirm to servers whether the sender’s server has been authorized by the domain owner In other words, DKIM adds the required digital signature to each message, allowing the client server to verify the origin of the message.
This helps verify whether the message was indeed sent by an authorized recipient, and ensures protection against email alteration or falsification during transmission With these features, you strengthen the security of your email system and reduce the risks associated with using unauthorized domains. Enhance your email verification practices and ensure a reliable communication environment with Salesforce.
Salesforce SPF Record Configuration
Salesforce, by default, uses its own domain as the Return-Path domain, causing DMARC failures with SPF.
To resolve this issue, we recommend enabling Bounce Management and Email Security Compliance through your Salesforce admin console.
Please note that disabling Bounce Management means that Salesforce will automatically manage the bound addresses. Instead, you will be responsible for receiving all bounce notifications and failed email deliveries to your nominated email address. This flexibility ensures proper address management while matching your DMARC requirements.
Step 1: Click on Setup > Email Administration > Deliverability
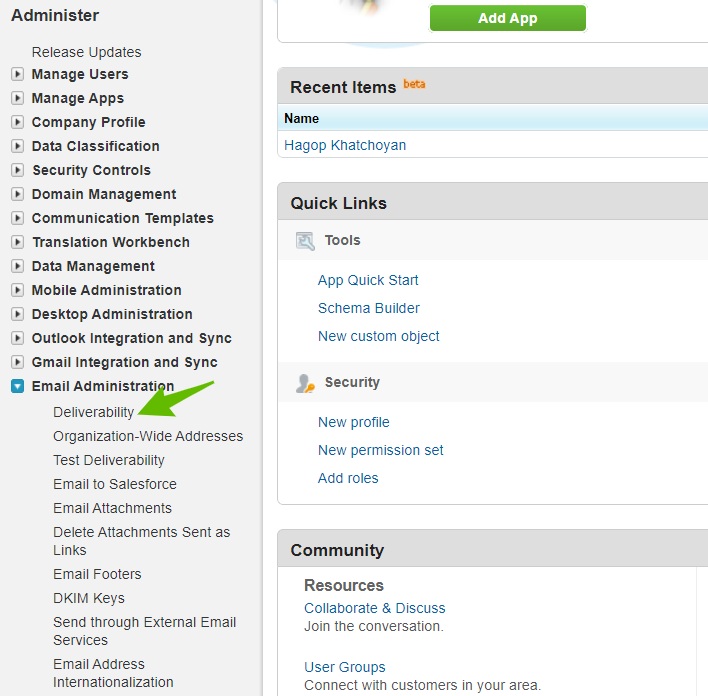
Step 2: Deselect the checkbox for “Activate bounce management”
Step 3: Deselect “Enable compliance with standard email security mechanisms”

Step 4: Click "Save"
Step 5: Add Salesforce SPF mechanism “include:_spf.salesforce.com” in your SPF Record.”
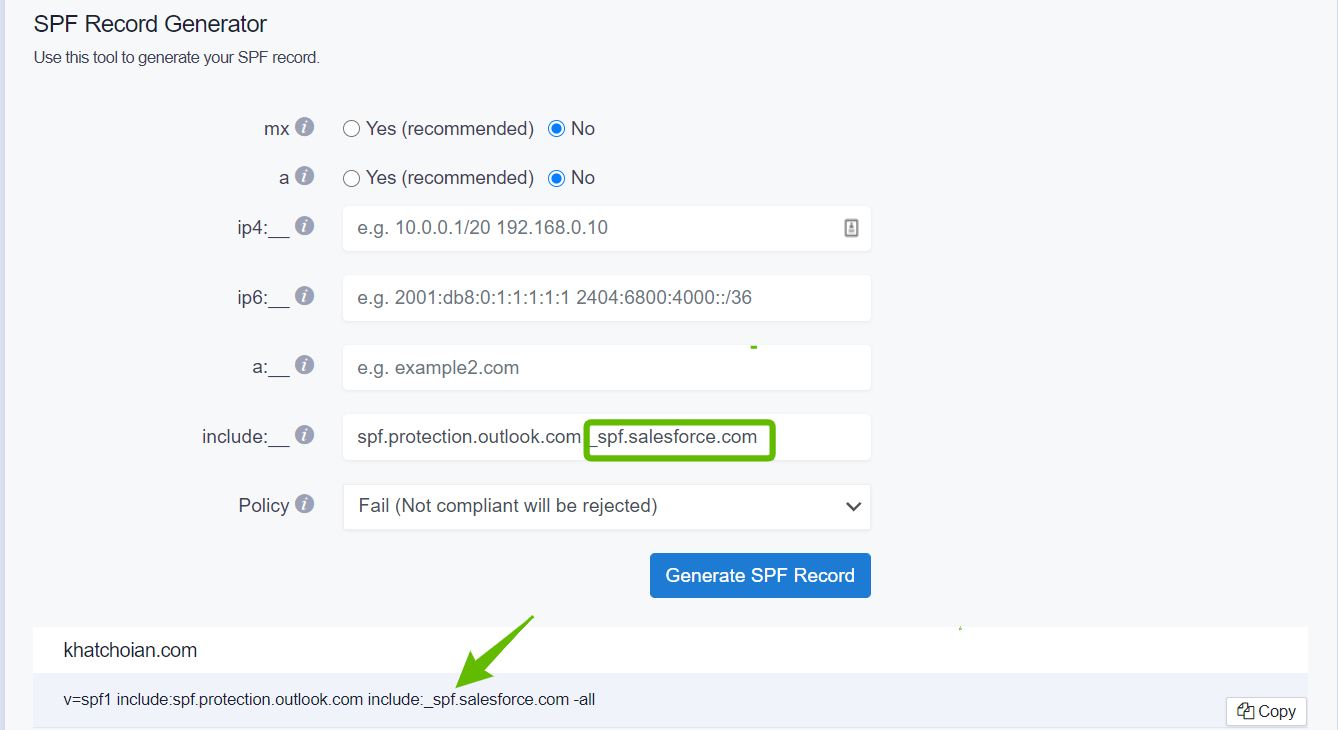
Step 6: Update your DNS TXT Record for SPF at your domain provider
Important Note: Make sure you don’t create multiple SPF TXT records on one domain. If you do, Salesforce email SPF will return a PermError.
If you are using multiple IPs, ESPs, Third-Party services, include them in a single SPF Record.
E.g v=spf1 ip4:17.67.137.221 include:_spf.salesforce.com include:thirdpartyservice.com ~all
Salesforce DKIM Record Configuration
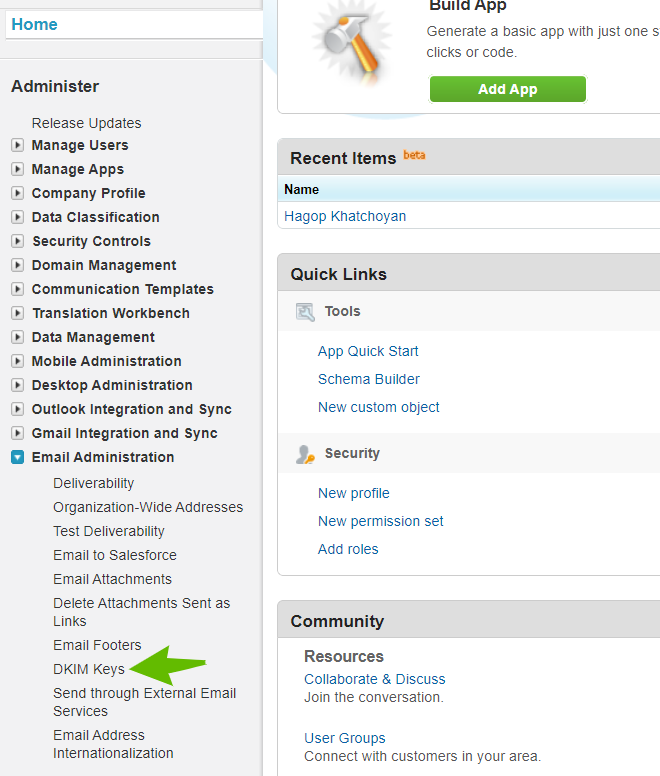
Step 1: Click on Setup > Email Administration > DKIM Keys
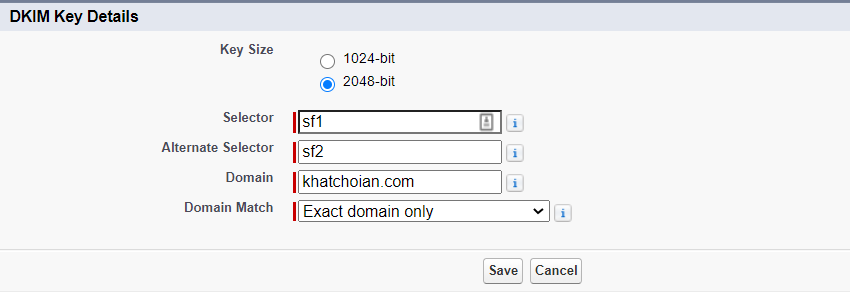
Step 2: Create a New Key with Salesforce
Step 3: Click “Save”
In this example, we’ll be using:
- 2048-bit DKIM key size
- DKIM selector “sf1” and alternate selector “sf2”
- “khatchoian.com” for the domain
- The strictness of the key allowing “Exact domain only”
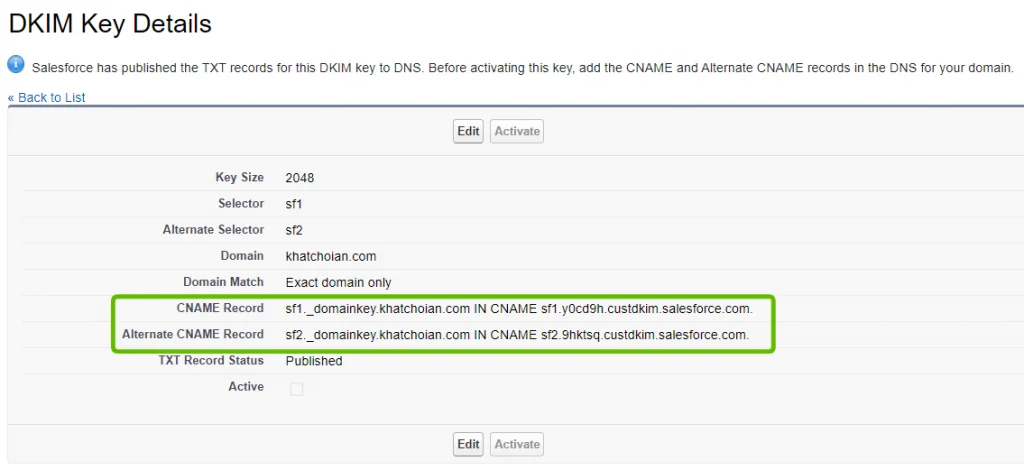
Step 4: Go “Back to List” and click on your added selector

Step 5: Add the provided CNAME Records in your DNS (Cloudflare, GoDaddy, etc.)
E.g Cloudflare


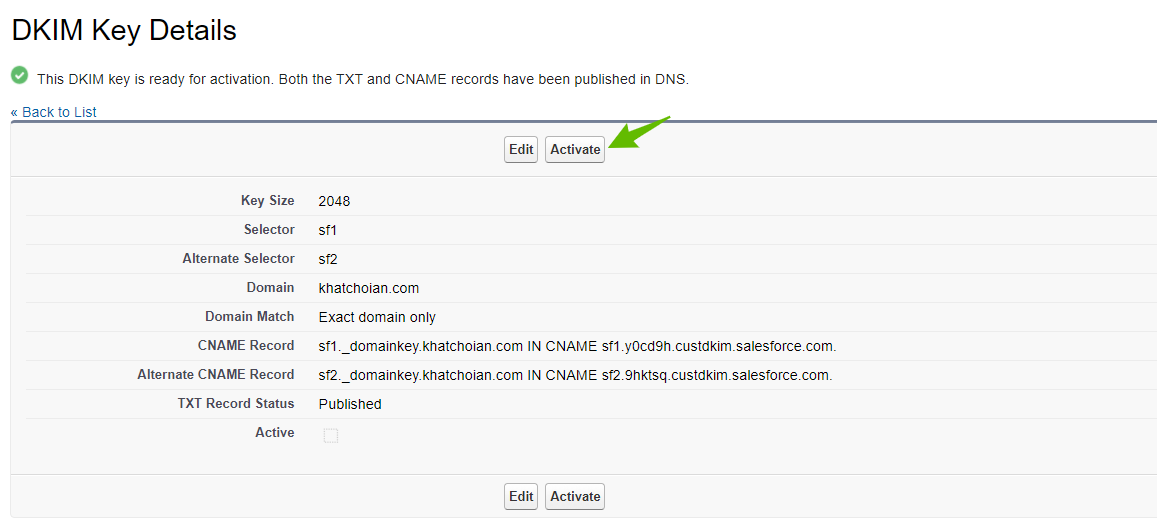
Step 6: Wait for the changes to take effect, and click on “Activate”
And you’re all set! Congrats, you now successfully authenticated your outgoing mail stream from Salesforce with SPF and DKIM.